Re: [Advising] Outlook Calendar/SSC Sync Work Around

This is late, but thank you so much for this suggestion! It's exactly the work-around
I was looking for!
Degree Works: http://www.utsa.edu/advise/DegreeWorks.html
NOTE: To access the Degree Works planner, click on 'Plans" at the top next to
'Worksheet,' highlight the appropriate plan and use the 'View' drop down
menu to select 'Calendar' view
Frequently Asked Advising Questions: http://www.utsa.edu/advise/students-faq.html
Students: please include name and banner ID on all emails and bring a copy of your degree
plan to all advising appointments
Lisa D. Merritt, M.A.
Academic Advisor I
Social Sciences Advising
University of Texas - San Antonio
One UTSA Circle
San Antonio, TX 78249-0641
(210) 458-4900 Appointments
(210) 458-4901 Fax
From: advising-bounces(a)lists.sis.utsa.edu [mailto:advising-bounces@lists.sis.utsa.edu] On
Behalf Of advising(a)lists.sis.utsa.edu
Sent: Tuesday, September 06, 2016 11:29 AM
To: advising(a)lists.sis.utsa.edu
Subject: [Advising] Outlook Calendar/SSC Sync Work Around
Hello all,
At the most recent SSC workflow meeting some issues were mentioned about the way
appointments show up in Outlook (and Campus). I wanted to present an option as a way to
work around them to add a second calendar in Outlook that will look like the old way.
This calendar can be printed and viewed on phones (though I haven't tested it on an
iPhone [Android all the way!] but I would expect it to work just the same since it is a
website). The second calendar will need to be manually updated with appointment
information, but I expect some won't mind to have it list student information exactly
as you'd like it. Also, other people will not have access to this calendar, unless you
give them permission.
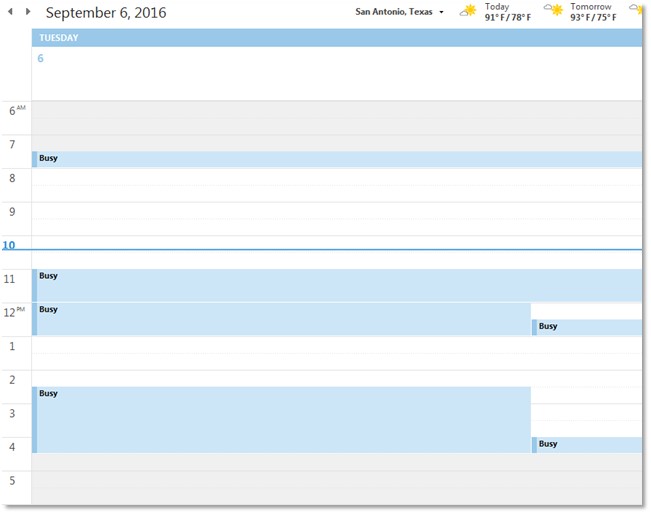
This is what your synched calendar currently looks like:
[cid:image001.jpg@01D20DE4.9FA2B1F0]
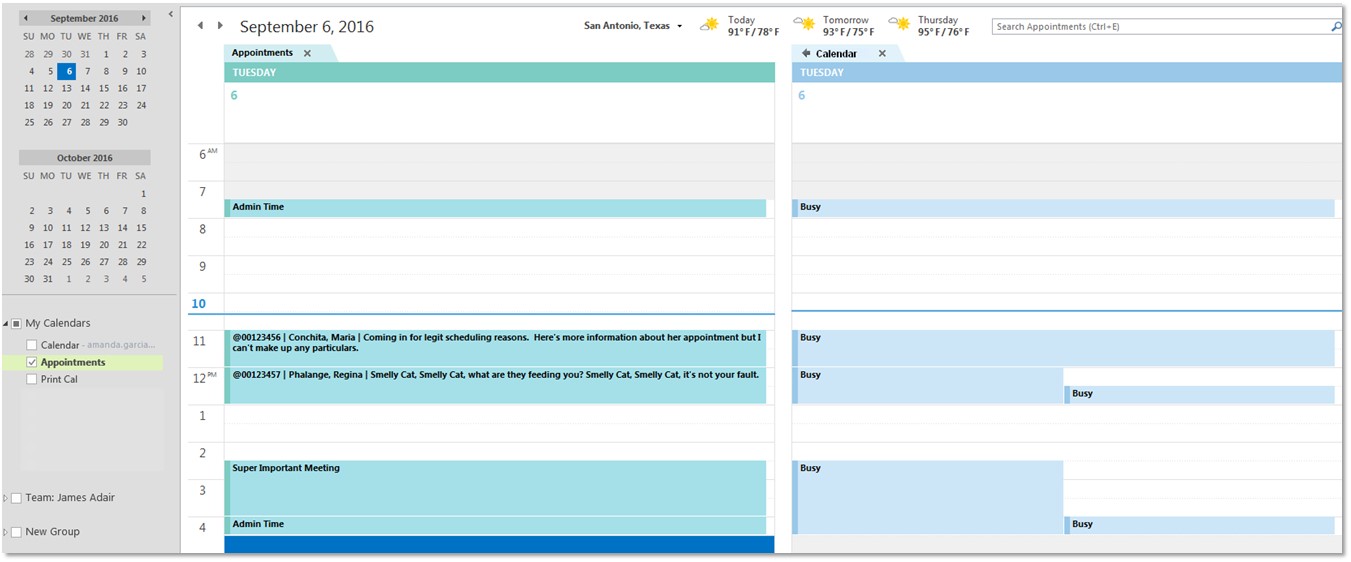
This is what it could look like with a second calendar:
[cid:image002.jpg@01D20DE4.9FA2B1F0]
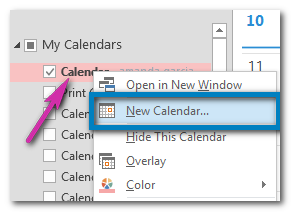
To set up:
Right-click on your current calendar from the menu on the left side of your screen and
select New Calendar...
[cid:image003.png@01D20DE4.9FA2B1F0]
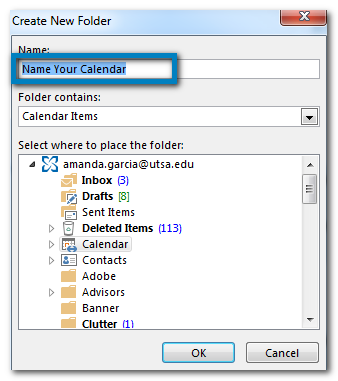
In the pop-up window, give your new calendar a name and then select OK.
[cid:image004.png@01D20DE4.9FA2B1F0]
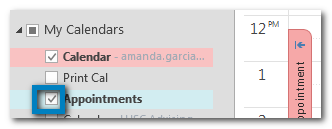
You have now set up your new calendar. Be sure that the calendar is checked in the menu on
the left for it to show.
[cid:image005.png@01D20DE4.9FA2B1F0]
To print the calendar, let the appointment calendar be the only calendar selected from the
menu on the left then go to File and Print as normal.
[cid:image006.png@01D20DE4.9FA2B1F0]
I hope this makes sense and that it is helpful for some! If you have any questions please
shoot me an email!
Here's to a four day work week!
Amanda Garcia
Program Coordinator
Undergraduate Studies Support and Technology Services
University of Texas at San Antonio
210-458-6519 (phone)
Attachments:
- attachment.htm (text/html — 11.2 KB)
- image001.jpg (image/jpeg — 37.9 KB)
- image002.jpg (image/jpeg — 108.7 KB)
- image003.png (image/png — 11.8 KB)
- image004.png (image/png — 20.3 KB)
- image005.png (image/png — 6.1 KB)
- image006.png (image/png — 3.0 KB)